The equestrian community for horse people everywhere
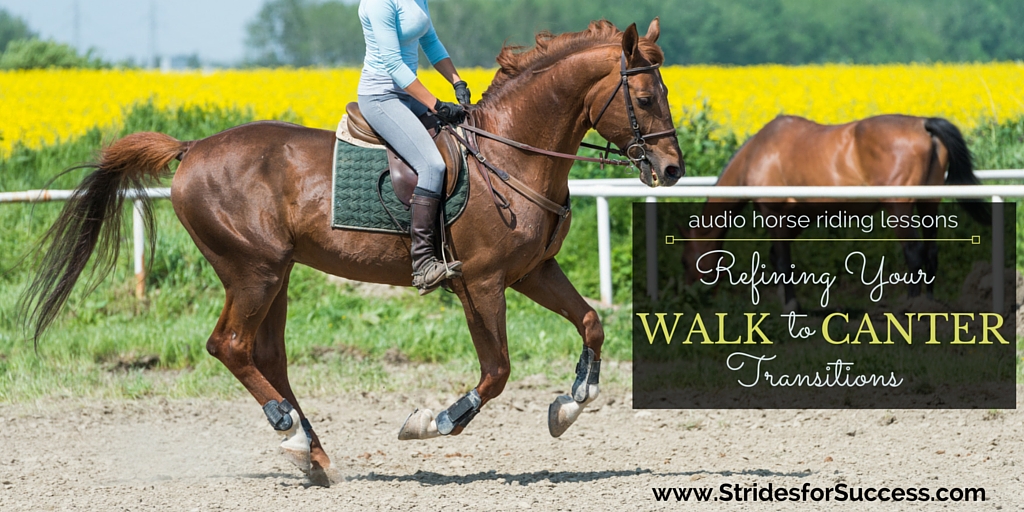
Refining Your Walk to Canter Transition
Do you find that when asking your horse for canter, you tend to 'over do' some aspects of your aids? Perhaps you throw your reins at your horse, or you try to 'push' too much with your seat or upper body... You are shoving and bumping about in the saddle and when your horse eventually 'strikes' the canter, you are so far from where you want to be position wise, that it takes the first 5 to 10 strides just to get your limbs back listening to you before you can even begin to turn your mind to the quality of the canter happening underneath you.
The Daily Strides Podcast episode of this topic is HERE >>
Assuming you have a fairly independent seat and your horse is schooled and developed enough to understand the aids to canter and then carry himself in the canter, I suggest beginning to improve your canter by introducing walk to canter into your schooling routing.
![]()
Refining your walk to canter is a fantastic exercise for both horse and rider as it will help you improve the actual canter itself due to the fact that you arrive at the transition more prepared, more organised and less hurried. It helps your horse by strengthening him and helping him to understand more subtle aids, due to you being more organised with giving them!
Before you begin it is important you understand the canter itself and the aids to ask your horse to canter... You probably know that your horse 'leads' with one of his front legs when he canters. Depending on which front leg you want him to lead with, you will ask him to strike off with the opposite back leg. Canter has a three-time beat, so using the left back leg as his 'striking leg' he will then move his inside back leg (right back leg) together with his outside front leg (left front leg), meaning the diagonal pair move together. The third beat comes from the leading front leg (in this case the right front leg) and then there is a short moment of suspension before the outside hind leg touches down again and the sequence begins over.
Preparation is everything, so establishing a good quality walk is essential. Ideally you want to have a little collection in your walk, which you can achieve by applying lots of half halts throughout the ride. Think of creating energy with your legs and then containing it or storing it, until needed, with your hands.
The walk must not lose its forward momentum and your horse must not become 'sticky' in the walk, which often happens when riders are trying to collect things up. Keep in mind that the half halt is only held for a split second; then released. Rather up the quantity of the half halts, than increasing the length you hold them for.
Regarding your aids and applying them, I recommend you begin by becoming aware of what leg is stepping down, onto the ground, at any given time underneath you. The reason this is important is because you need to apply your aids to ask for the canter either just before or when the outside hind leg is busy moving forward, coming under the horse, and before he 'steps down' onto it.
When I am teaching in the arena, I ask my riders from very early in their riding journeys to begin identifying the different legs underneath them by saying 'Now...' 'Now...' 'Now...' 'Now...' when a particular leg is 'touching down'. It allows them to become familiar with the rhythm and sequence of the footfalls, so as they can then, while they are still repeating' Now', begin noticing how it 'feels' when that hind leg is beginning to lift up to moving forward and underneath.
Next time you are in the saddle, do this exercise. Feel how, when his inside back leg is moving forward, and this is nice and easy to feel in walk, your corresponding seatbone is 'down'. This is due to your horse having to swing his barrel slightly to the other side in order to make room for that leg to come underneath him.
So, when the left back leg is coming forwards, your left seatbone will be slightly lower and also moving forwards. While this is happening your right seat bone will be slightly raised and will feel as though it is 'sliding' back.
Once your horse puts his right back hoof on the ground, you will feel your right seat bone raise up and, begin to feel like it is sliding backwards, as your horse moves over the right back hoof. While this is happening, your left seatbone will be lowered slightly and sliding forwards, as your horses left back leg moves underneath him, preparing to bear the weight again.
You will feel that as your inside seatbone is at its most forward point, your outside seatbone will be 'back' slightly and higher that the inside. Then, as the inside hind leg touches the ground, and your horse begins to lift his outside hind leg forward to put down underneath him, your outside seat bone will 'drop' and begin to move forward (again due to the shift in your horses barrel to make way for the leg coming underneath him).
Now, I personally think the exact time to ask for the transition depends a lot on your horse and how responsive he is to your aids
If he is a little 'laid back' you may have to ask just before your inside seatbone is at its most forward position and before it begins to move back 'up' and back. However, if your horse is a little hot, or quite responsive, it may work better for you to ask just as your outside seatbone begins to 'dip' and move forward again.
Knowing exactly when to ask comes down to 'feel', which (good for you) can be learned through time and consistent practice in the saddle.
There is a blog post and audio lesson on 'Improving Your Feel in the Saddle' HERE >>
Often, we ask too late or at the incorrect time and the result is either our horse trots, because he cannot get his legs into the sequence for canter or he begins to canter with his front legs first, not striking off with the outside hind. This is not correct, and you will almost feel that your horse skips. If this happens, bring him back to walk and try again.
When setting up your first walk to canter transition, have a clear idea in your mind on how you are going to ask for canter. Focus your attention on establishing a good, active walk with lots of energy. Become clear on how you are going to apply your aids, and when.
Your seat is vitally important in asking for the canter and often you hear of using your seat to 'scoop' your horse up into the canter. This cannot happen unless you are truly carrying your upper body and ask for the transition at the correct time.
Your inside leg will remain on the girth, your outside leg will 'swing' back to indicate to your horse to strike with the outside hind leg and your hands will follow the movement when it happens.
Start riding a 20 meter circle, which will help you initially as your horse will already be positioned with a bend to the inside, increasing your chance of a clean strike on the correct lead higher; you will be working with your horse rather than against.
Resist the temptation to lean or push; the canter is asked for with your seat first and foremost, but your legs and hands must also do their job in both indicating and allowing your horse to canter
The transition should be clean. If your horse begins to rush in the walk, trots or jogs a little when asked, immediately bring him back to walk and work on preparing a good transition all over again, beginning with the walk and half halts.
Keep in mind that the quality of the transition can only be as good as the gait leading up to it, so set your intention on an achieving an active, forward walk
Once you have performed the walk to canter transition, remember to reward your horse with a kind word and a softening of the inside rein. Let him know that he has indeed carried out what you asked. If you are late to reward, he may not know for future reference what you are looking for.
Continue with the canter for 15 to 20 strides, noticing how quickly it takes you to establish a rhythm this time. Have you managed to keep your upper body light in the saddle? Is your lower leg where it should be? Are you following your horse with your pelvis and hands?
Continue to practice this on both reins and notice if one lead is easier to achieve than the other. Also keep your attention on how long it takes you to feel 'in control' of the canter and if it happens somewhat sooner than if you canter through trot.
I really believe that refining your aids and technique while riding the walk to canter will help also improve your trot to canter transitions.
You can find the original blog post & Daily Strides Podcast HERE >>
Happy Riding
Lorna
Here are a few past blog posts & Daily Strides Podcast episodes on cantering that you may enjoy:-
- Setting Up Better Canter Transitions HERE >>
- Keeping Canter Work Interesting HERE >>
- 4 Steps to a More Comfortable Canter HERE >>
Views: 1128
Comment
The Rider Marketplace
International Horse News
© 2026 Created by Barnmice Admin.
Powered by
![]()
You need to be a member of Barnmice Equestrian Social Community to add comments!
Join Barnmice Equestrian Social Community